

How do you “influence” a ML model? For example, imagine a scenario where you’d like to detect anomalies in a given data set. You reach for your favourite algorithm – in my case Isolation Forest:
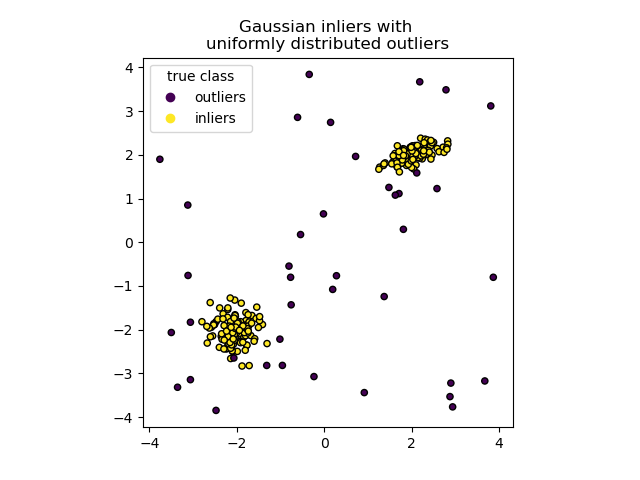
It does fine for most cases, except that one data point which invariably gets classified as an anomaly when in fact it’s not. How can we incorporate this feedback into our model?
There are a few possibilities:
- Oversampling
- Sample Weighting
- Modifying the algorithm itself
In this article we’ll focus on the first two options. Modifying the algorithm itself is not always possible and is of course highly specific to the algorithm you chose in the first place. (Aside: for those interested, one good idea with respect to Isolation Forest is to train a separate model on the output of each tree in the forest… the separate model can be a supervised model like logistic regression which allows you to change the label of an erroneously classified “anomaly”)
Oversampling
Isolation Forest will classify a point as an anomaly if that data point is easily separated from it’s neighbours. Most anomaly detection algorithms work this way… if a point is relatively “far” from other points in the dataset then it’s clearly an anomaly. A simple and intuitive way of tackling our problem in the example scenario is to make duplicates of our false positive anomaly, to make sure that it’s has enough “neighbours” not to be considered an anomaly. This is called oversampling. What strategy should we use to duplicate our data point? Most often simple duplication (copy/paste) wont work due to the way most ML algorithms work.
As always the answer is, it depends. Several algorithms exist such as SMOTE. In a very basic sense, SMOTE creates new datapoints on the “lines” which connect those datapoints you’d like to oversample… which give rise to the weird “lines” we see in the oversampled data set (in purple) below:
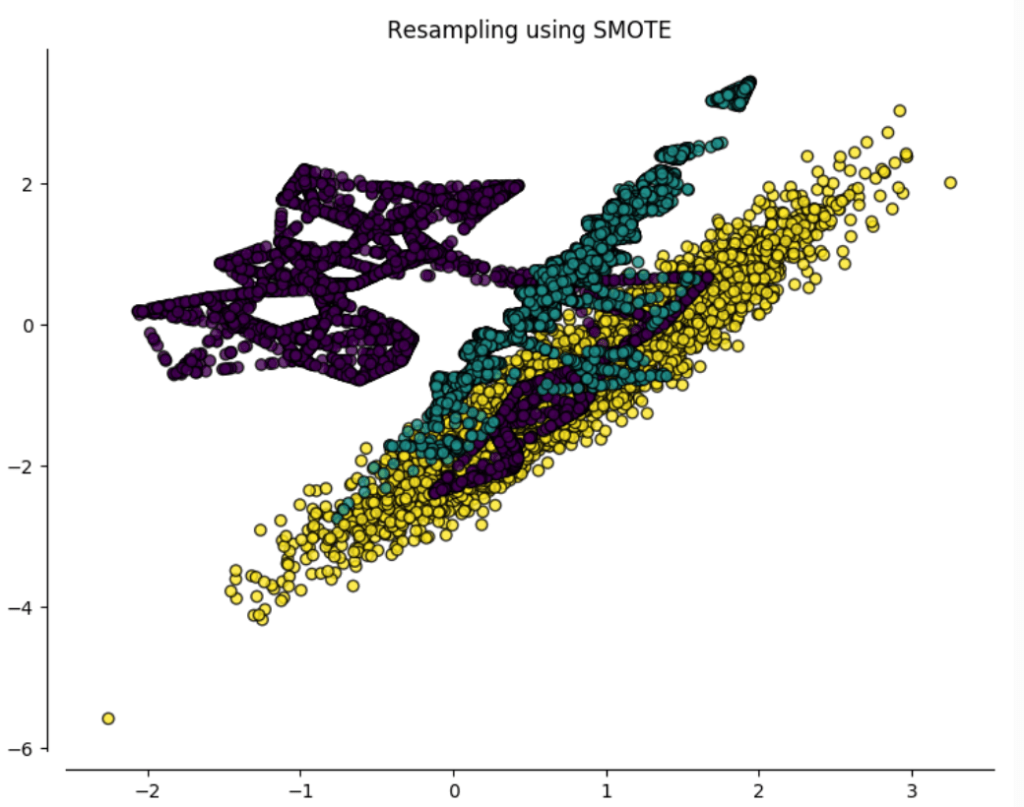
In our particular case this may present a problem. Notice how the purple class extends into the other two classes due to a couple of outliers. In our example this will result in SMOTE changing our data set too significantly.
The moral of the story is sometimes simpler is indeed better, and we can simply over sample our false positive using naive normal random sampling. This means getting our false positive point as a “seed”, and creating duplicates by adding a random number pulled from a normal distribution whose mean is the false positive point and whose variance you control (which in turn controls how far “spread out” from the original your duplicates will be).
Sample weighting
Most (but not all) ML algorithms also let you assign a “weight” to each training sample… for example:
- Sample Weight = 0 : ignore this sample
- Sample Weight = 1 : give this sample a normal weight
- Sample Weight = 2 : give this sample twice as much weight as other samples (so the model will try twice as hard to include this sample within it’s decision boundary)
This is also quite intuitive: if a sample is falsely classed as an anomaly, we can give the sample a higher weight to try make the ML model classify it properly. The higher the sample weight, the more you’d like to include the sample within the ML model’s decision boundary.
How do they compare?
Which method to use again depends on what you are trying to achieve. Over sampling is the more “forceful” of the two options as shown in the graphic below:
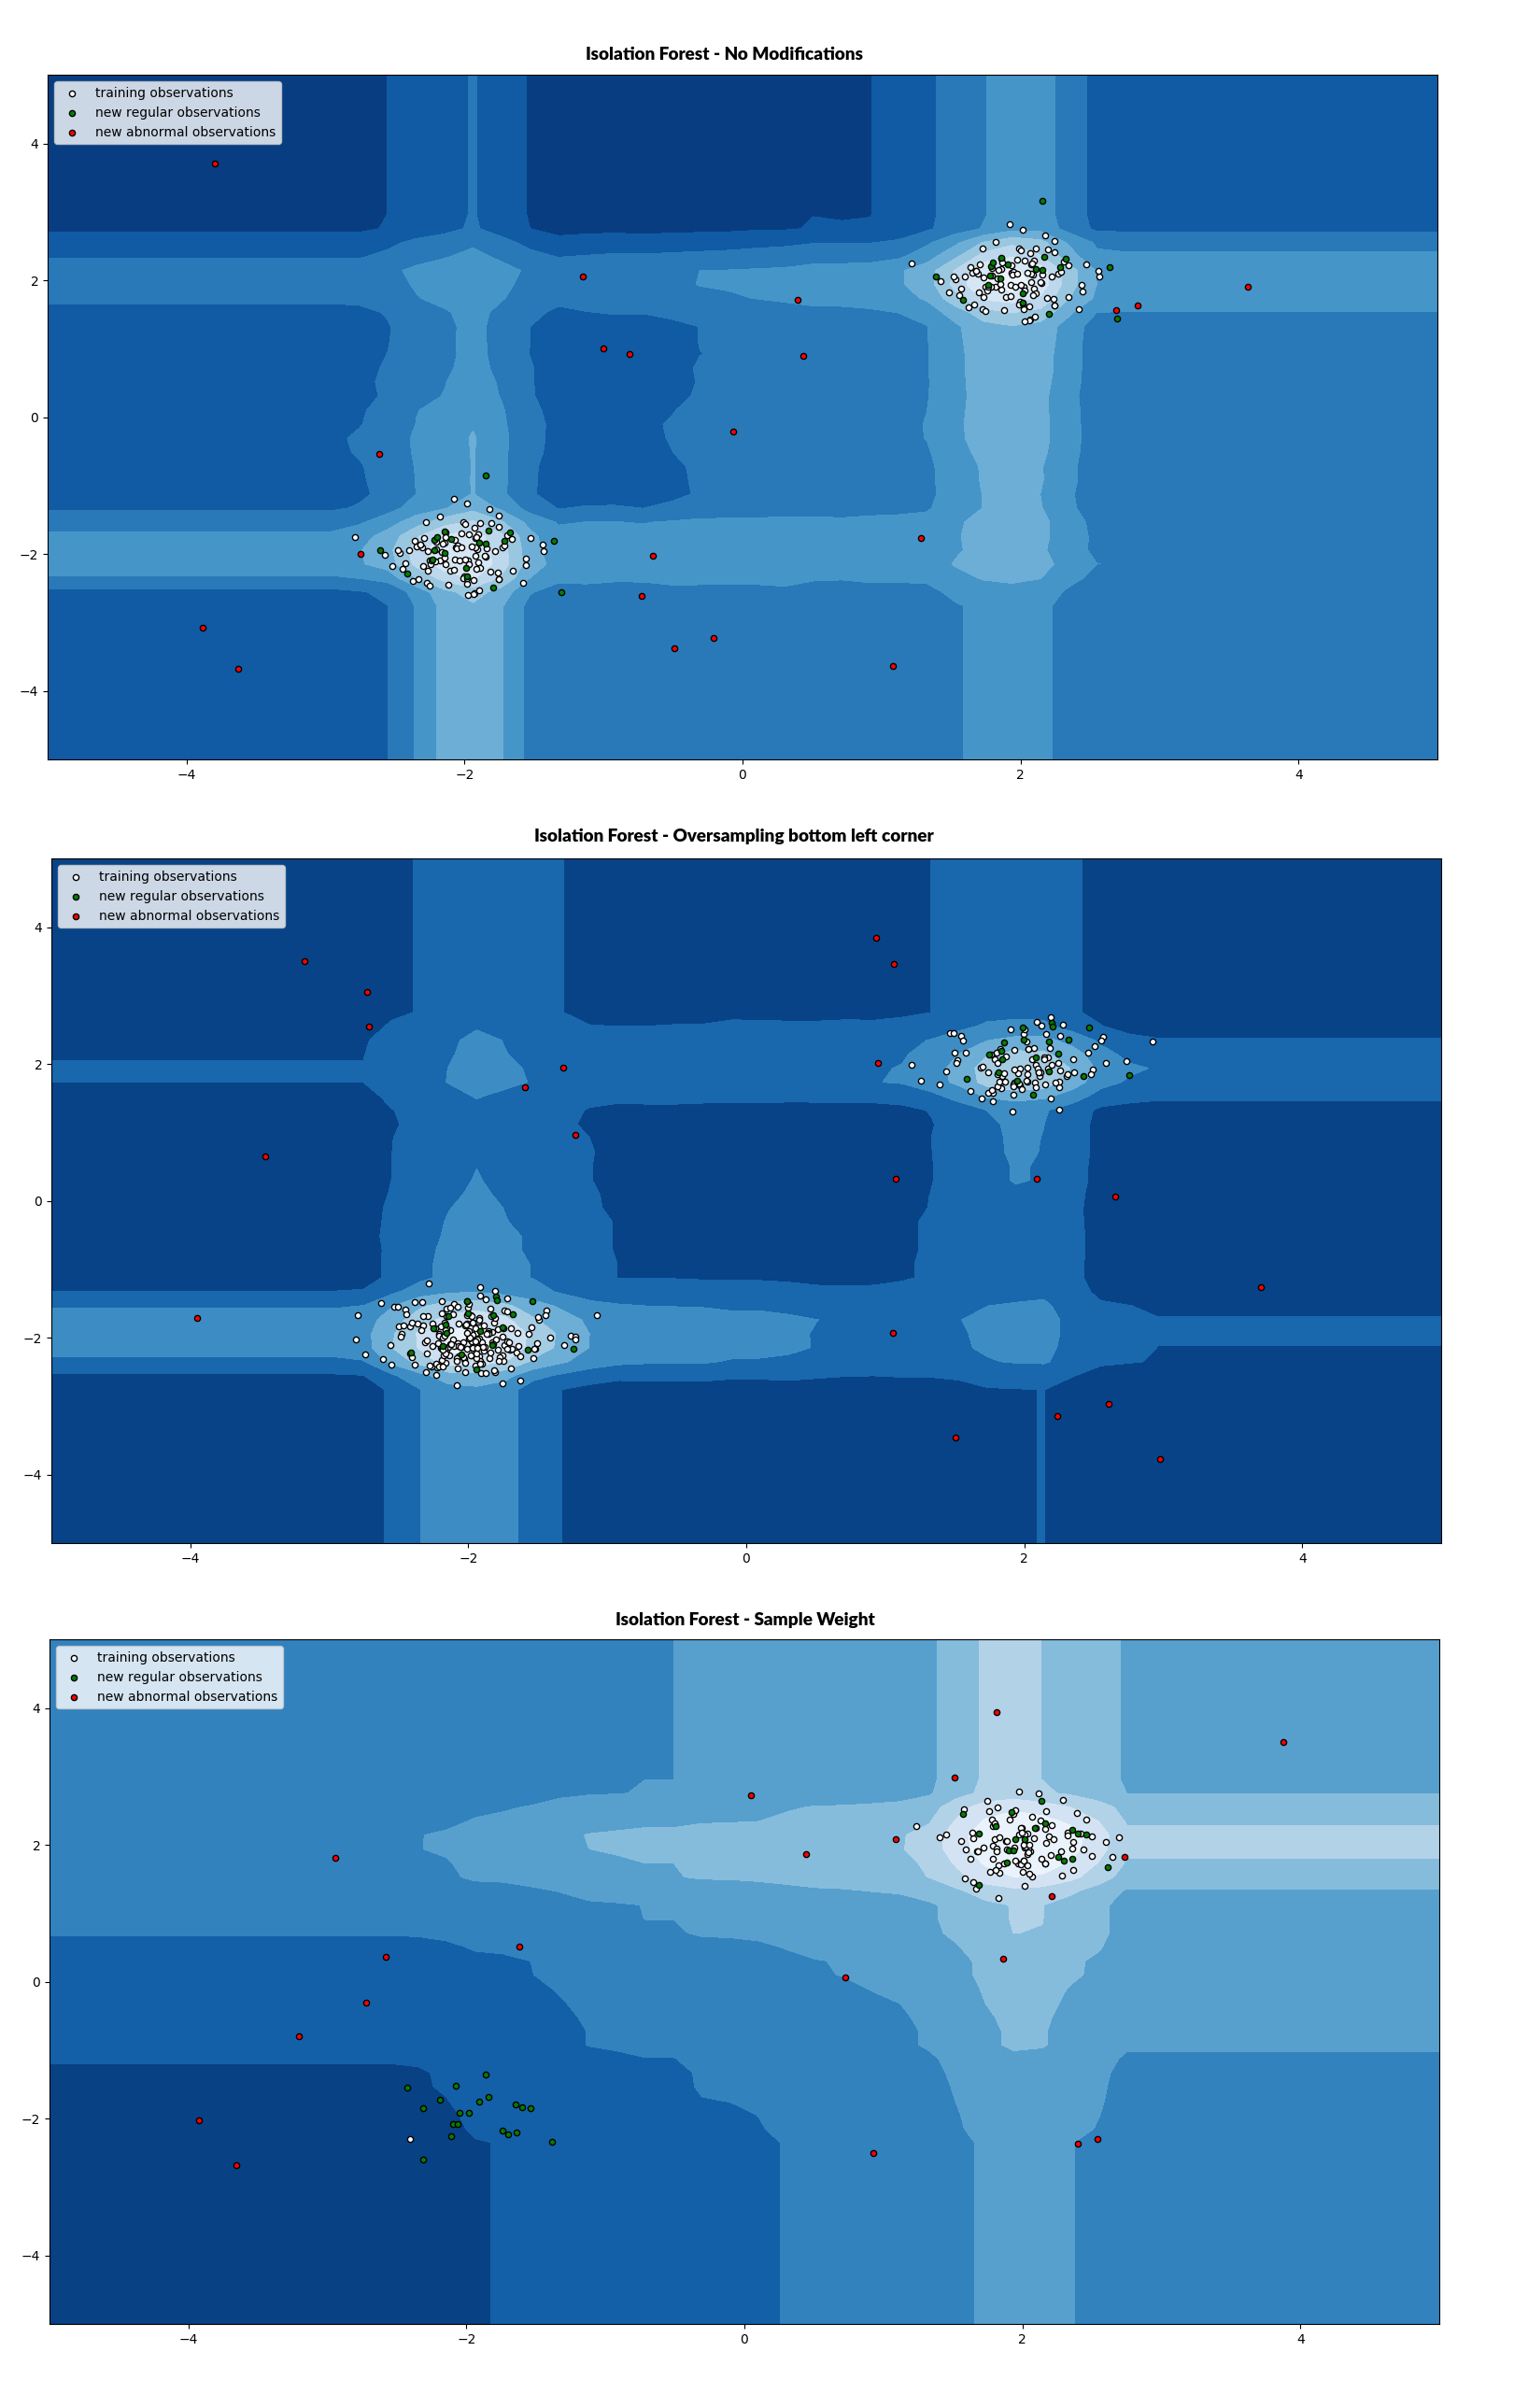
In the first image above we see the original data set for comparison. The second image shows the results of the oversampling technique. In this case we oversampled a point in the bottom left corner. Note how the decision function changed when compared to the first image. The decision function has “shifted” significantly towards the bottom left (thicker bands of light blue)
In the third image we left just a single training point (in white) at the bottom left, however we assigned a very high sample weight to this one data point. You see that now the decision function once again changed, however rather than becoming more pronounced in the bottom left corner it seems to “reach out” from the top right towards the bottom left. In other words, this single high-weight sample pulled the edge of the decision function towards it, though not enough to be actually within the decision function.
Conclusion
Oversampling is the more direct way to influence our anomaly detection algorithm, and is more “precise” in making sure other anomalies remain marked as anomalies. Sample weighting is useful when you’d like to be less precise and influence the model more subtly by smoothing the resulting decision function towards your high weight samples.

You must be logged in to post a comment.