

In this second part of my series, I’ll go into configuring your PI to have:
- A “security mode” that will record about 30-60 seconds of video everytime movement is sensed wherever a raspberry pi is installed
- Display the local temperature, humidity security monitor arming on a simple web UI
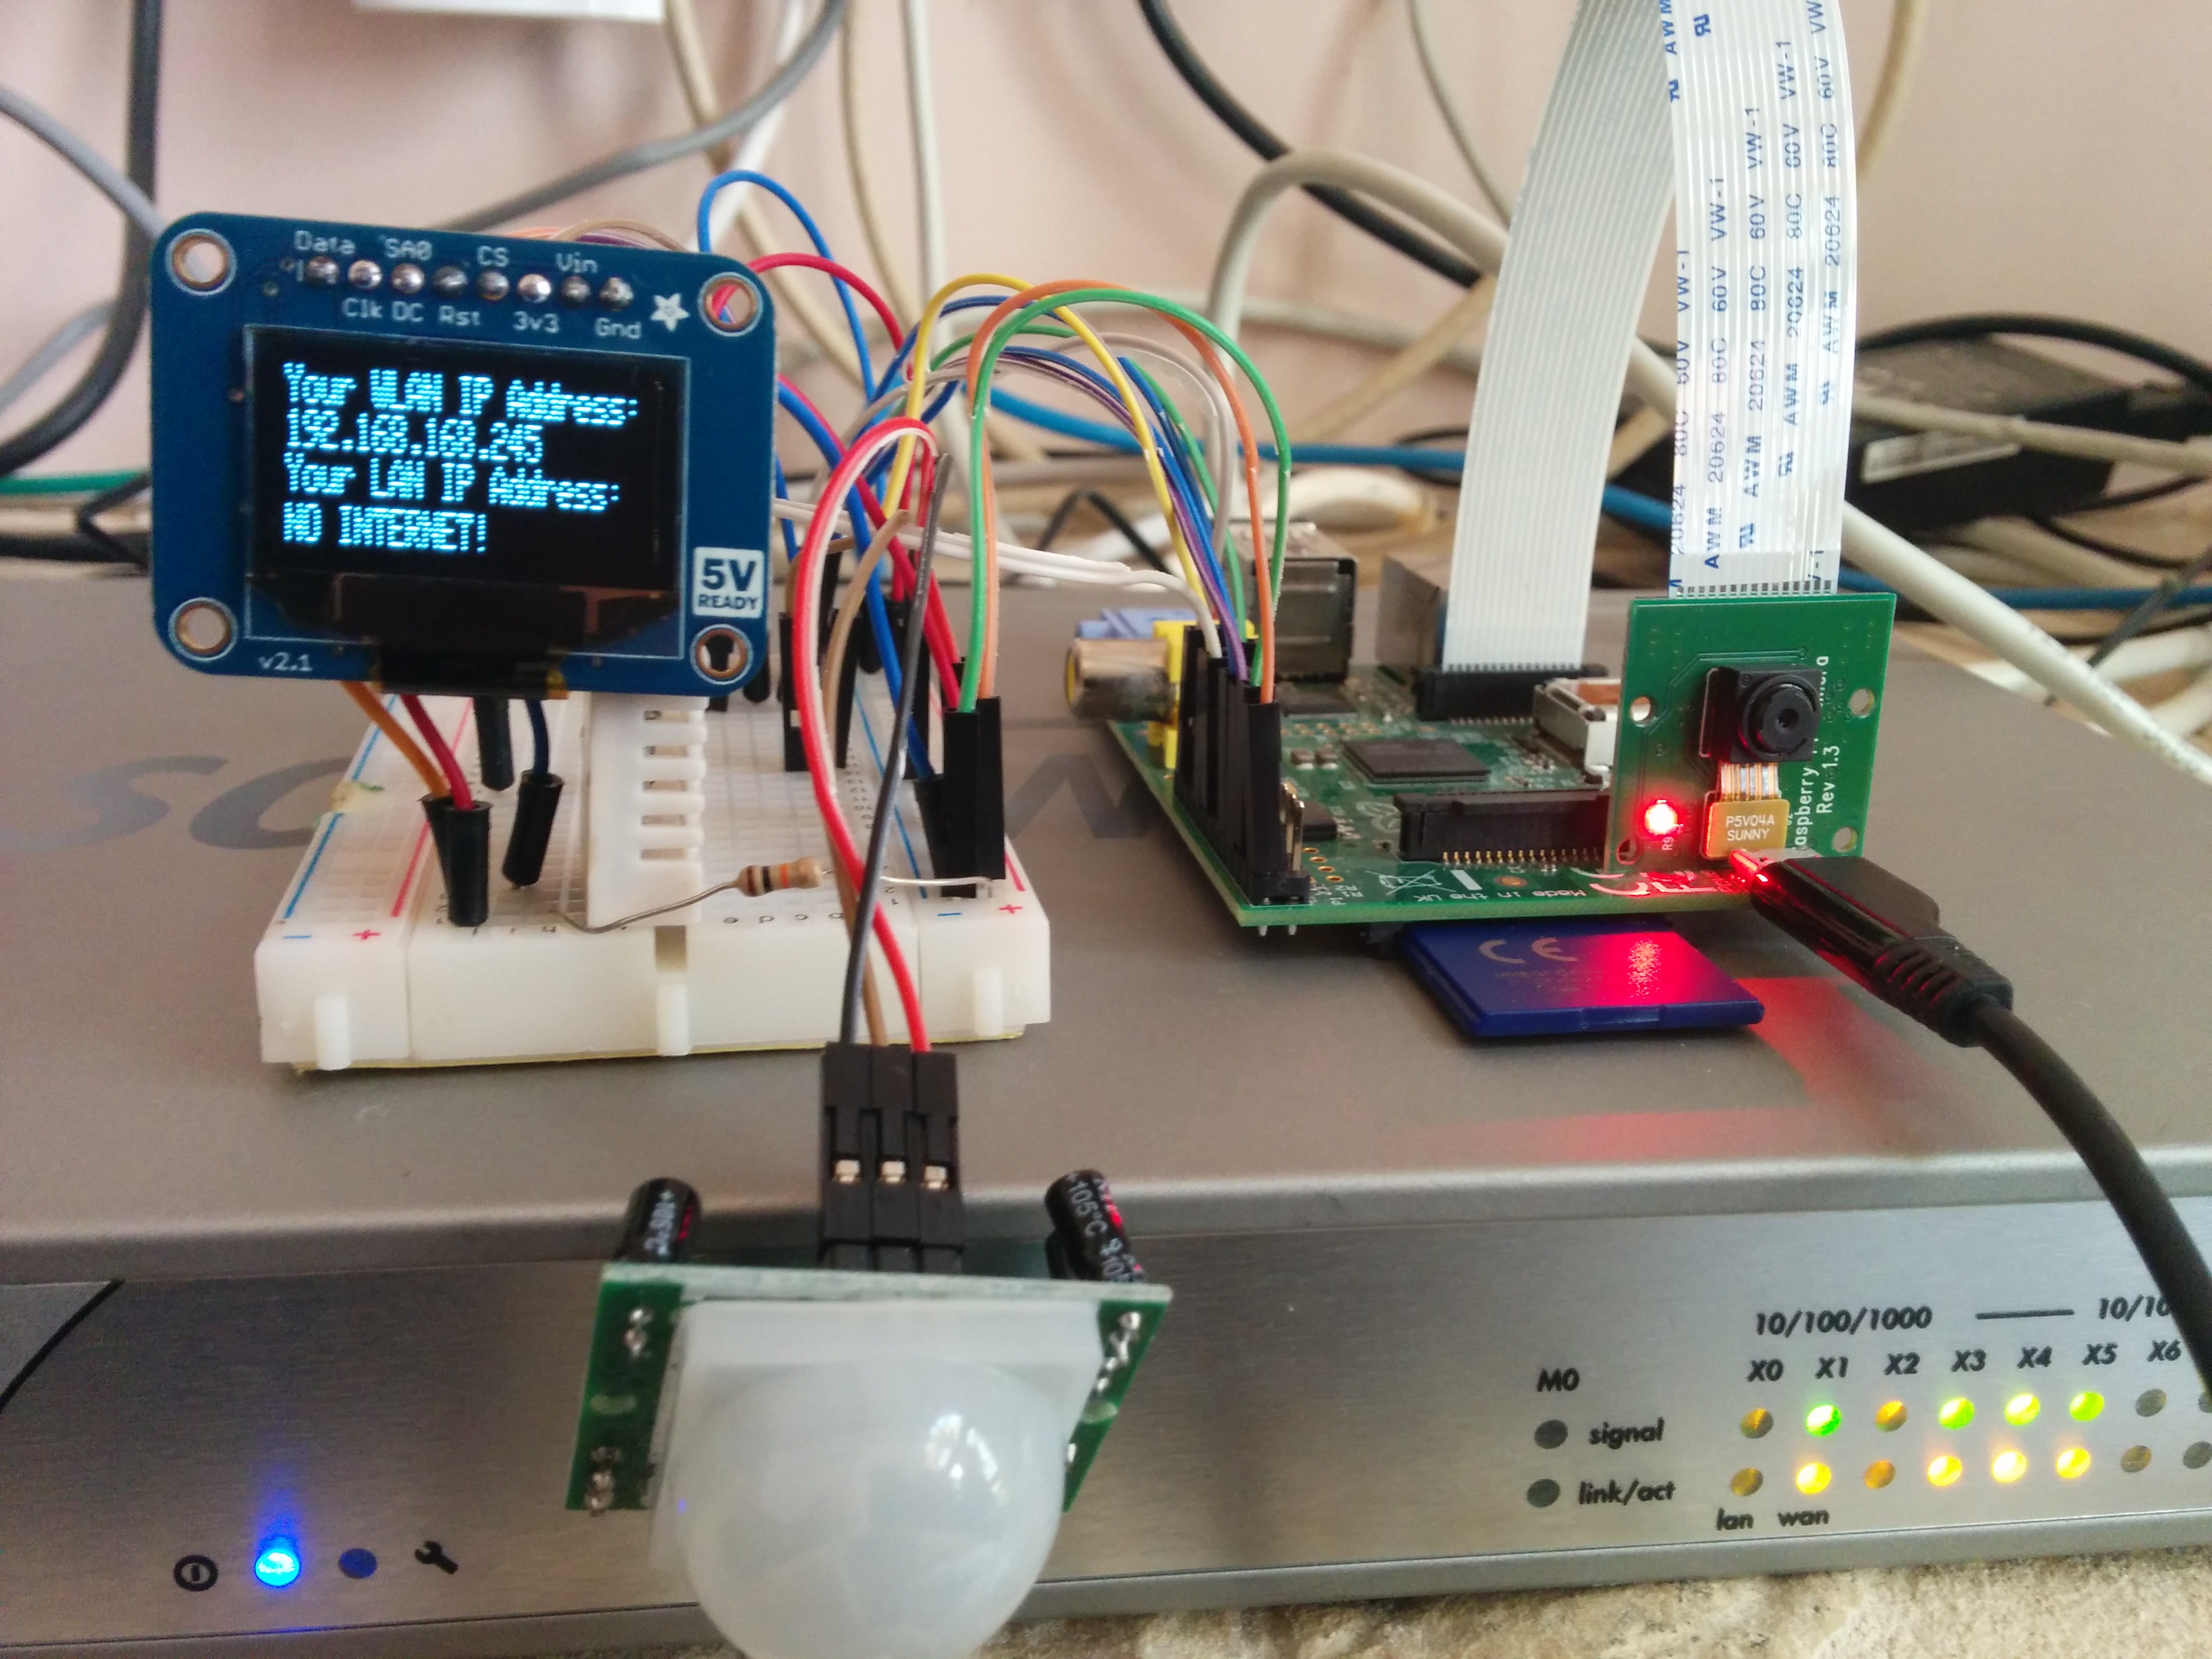
In this photo, reposted from a previous article, you can see both the PIR (infrared sensor), and camera that will be used in this post.. note how tiny they are! For scale reference, that blue square just under the red LED of the camera on the right is an SD card….
First off, have a quick read through the following from adafruit to get acquainted with the PIR sensor:
http://learn.adafruit.com/adafruits-raspberry-pi-lesson-12-sensing-movement/overview
The article explores how to wire up the PIR sensor. We next have to get the raspi cam setup so we can take videos whenever movement is sensed by the PIR. The hardware I am using can be found here:
http://www.raspberrypi.org/camera
First some groundwork:
vi /etc/default/tmpfs
We will store the video file temporarily in /tmp, and then transfer this via FTP to a storage server (a QNAP in my case). To make things really fast, and save on the SD card life of the raspiPI, we use tmpfs, which by default is already installed on raspbian. This will ensure the data is stored in memory, making it quite fast. To store the /tmp file in memory via tmpfs, find the following line and uncomment it:
RAMTMP=yes
Next we install the python framework called “flask“. I find this framework extremely easy to use, and it’s fully featured, so it’s a winning combo in my opinion:
pip install flask
Last, we install a python based program that basically starts / stops arbitrary scripts of your choosing, and can even restart them when they die (this is very similar to the “forever” program used by node.js developers). The program is called “supervisor” and is installed with a simple:
apt-get install supvervisor
Let’s quickly build the webinterface using flask…
Note how in lines 32-33 in the above program, I am retrieving values from a pickle file wherein I’ve stored the sensor readings from the previous article to avoid over-taxing the sensor circuit. The script is quite easy. One function “index” serves a simple homepage, the other, “toggle” uses supervisor to turn the PIR sensor program on or off. The index.html file itself is nothing special:
<html>
<head>
<script src=”http://code.jquery.com/jquery-1.11.0.min.js”></script>
<script src=”{{ url_for(‘static’, filename=’js/raphael.2.1.0.min.js’) }}”></script>
<script src=”{{ url_for(‘static’, filename=’js/justgage.1.0.1.min.js’) }}”></script>
</head>
<body><table>
<tbody>
<tr>
<td><div id=”tempGauge” style=”height:200px; width:250px”></div></td>
<td><div id=”humidGauge” style=”height:200px; width:250px”></div></td>
</tr>
</tbody>
</table><h1>Status: <a href=”/toggle”>{{status}}</a>
<h1><a href=”./securityFeedOn”>View Live Feed</a></h1><script>
var g = new JustGage({
id: “tempGauge”,
value: {{ temp }},
min: 10,
max: 40,
title: “Temperature *C”
});
</script><script>
var g = new JustGage({
id: “humidGauge”,
value: {{ humid }},
min: 0,
max: 100,
title: “Humidity %”
});
</script></body>
</html>
It shows a page similar to this (the graphics come courtesy of http://justgage.com/):
 The “unarmed” link will toggle the security system to start sensing movement. Going back to the flask python script, if you notice, on lines 19 and 22, I call on supervisor to start or stop the program called “pir”. This “pir” reference comes from the supervisor configuration file (/etc/supervisor/supervisord.conf) where I added a section similar to the following:
[program:flask]
command=python /home/pi/flask/main.py[program:pir]
command=python /home/pi/PIR.py
autostart=false
The first program defined (“flask”) points to the flask script I present previously, and is started automatically on bootup. The second program is the “pir” program I reference in the flask script. Here’s the full PIR.py script:
This file contains hidden or bidirectional Unicode text that may be interpreted or compiled differently than what appears below. To review, open the file in an editor that reveals hidden Unicode characters.
Learn more about bidirectional Unicode characters
| from subprocess import call | |
| import time, datetime | |
| import smtplib, ftplib | |
| import RPi.GPIO as io | |
| import multiprocessing | |
| io.setmode(io.BCM) | |
| pir_pin = 24 | |
| GMAIL_USERNAME = "YOUR_EMAIL_ADDRESS_HERE" | |
| GMAIL_PASSWORD = "YOUR_PASSWORD_HERE" | |
| recipient = GMAIL_USERNAME | |
| io.setup(pir_pin, io.IN) # activate input | |
| def sendEmail(): | |
| #send email | |
| session = smtplib.SMTP('smtp.gmail.com', 587) | |
| session.ehlo() | |
| session.starttls() | |
| session.login(GMAIL_USERNAME, GMAIL_PASSWORD) | |
| headers = "\r\n".join(["from: " + "security_vassallo", | |
| "subject: " + "Motion Sensor Tripped!", | |
| "to: " + recipient, | |
| "mime-version: 1.0", | |
| "content-type: text/html"]) | |
| content = headers + "\r\n\r\n" + "Alert – motion sensor tripped at " + str(datetime.datetime.now()) | |
| session.sendmail(GMAIL_USERNAME, recipient, content) | |
| ##### main program ###### | |
| while True: | |
| if io.input(pir_pin): | |
| # if movement is detected, print the below to console | |
| print("PIR ALARM!") | |
| # fire off a seperate process to send a notification email | |
| d = multiprocessing.Process(name='emailDaemon', target=sendEmail) | |
| d.daemon = True | |
| d.start() | |
| # as per the raspberry pi camera instructions, call raspivid to record a 10 second (-t 10000) video clip | |
| # notice we store the video in /tmp – so in memory due to tmpfs | |
| # also notice the use of -rot 180 to rotate the image by 180 degrees since my camera is positioned upside-down | |
| call(["raspivid","-o","/tmp/myvid.h264","-w","640","-h","480","-b","3000000","-t","10000","-rot","180"]) | |
| # here we call on the python n-built FTP library | |
| session = ftplib.FTP('YOUR_FTP_IP','YOUR_FTP_USER','YOUR_FTP_PASSWORD') | |
| file = open('/tmp/myvid.h264','rb') | |
| session.cwd('Vassallo/Security') | |
| timestamp = time.strftime("%d-%m-%Y_%H:%M:%S", time.gmtime()) | |
| # here we append a timestamp to the file so we know when it was taken | |
| filename = "{}.h264".format(timestamp) | |
| # file transmitted over FTP | |
| session.storbinary('STOR {}'.format(filename), file) | |
| file.close() | |
| session.quit() | |
| time.sleep(1) | |
| time.sleep(0.5) |
I’ve inserted comments into the script which hopefully makes it clear enough to the reader what’s happening. In essence the script triggers an email alert, a 10-second video clip, which is then sent via FTP to a server.
That’s it!! try it out 🙂 In the next article, we’ll setup a real-time feed from the camera using mjpg-streamer, stay tuned….

Is it just me or is the flask script missing from the page?
Hi John
Thanks for your interest! The code is hosted as a gist on github, and I noticed that sometimes it takes a while to load to get embedded into the page…. But, you can access the code directly here if you want:
https://gist.github.com/dvas0004/9450897#file-raspicc_pir-py
Good morning 🙂
I think it would be more easy if you choose os.system instead of subprocess.call 🙂
Hope I could help,
Lukas 🙂