
")
In the first part of this two-article series, we explored rolling your own WordPress GraphQL adapter, inspired by the work done by GatsbyJS, written in Javascript and hosted on GraphCool. In this article, we’ll build the same thing, this time using Java. Spring Boot and GraphQL Java Kickstart make this quite easy.
Pre-requisites
For anyone joining us now – you need to go through the first part of the previous article and enable the WordPress REST API – as well as get an authentication token. As in the previous article, building a full OAuth2 service is out of scope, so we’ll again simply get a token via curl and hard-code it into our application.
Dependencies
From the Spring Boot side of things, use Spring Initializer to add “Web” or “Reactive Web” ( I went with the latter). The official documentation of GraphQL Java Kickstart makes the GraphQL side of things quite simple as well:
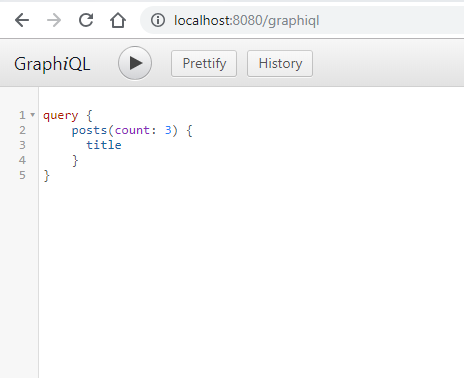
Add the dependencies listed in the above documentation and you’re good to go. If you’ve got everything installed properly, running the application as-is will allow you to access the GraphQL playground on http://localhost:8080/graphiql. This is why GraphQL Spring Boot is so useful – you have a fully functional GraphQL environment right off the bat – minimal configuration required!
Ensuring Reactive Web works
Strictly speaking you don’t need to do this – heck GraphQL will work without Spring Web or Spring Reactive Web at all. However, you probably would want your Spring application to serve additional content apart from the GraphQL data, so I included this section. besides, Spring Boot makes serving content over Reactive Web a breeze. Create a new file (HelloController), and insert the following:
package com.example.demo;

import org.springframework.web.bind.annotation.GetMapping;
import org.springframework.web.bind.annotation.RestController;

@RestController
public class HelloController {

    @GetMapping("/hello")
    public String handle() {
        return "Hello WebFlux";
    }
}
Not counting package and import statements, that’s a hello world using webflux in under 10 lines of code. The annotations in the code also make it pretty self-explanatory. We define a class that acts as a REST Controller, which will respond to a single path via a mapping: GET requests to “/hello“. Restarting your app and visiting http://localhost:8080/hello should return “Hello Webflux“. Fleshing this out to something more useful is left as an exercise for the reader.
Defining our GraphQL schema
One of GraphQL’s strengths is the ability to have a fixed (but very flexible) schema which is akin to introducing static typing to REST APIs. The schema allows your programming environment to know what type of queries to expect, and what type of responses it should send out. This in turn makes validation and autocompletion easier. This is where we encounter the second benefit of using GraphQL Spring Boot. In order to define the schema, we simply need to create a file ending in .graphqls anywhere in our classpath (typically under the “resources” folder). Go ahead and create such a file, and use the following code:
type Query {
    posts(count: Int): [Post]
}

type Post {
    title: String!
    content: String!
}
Note the similarities between the above, and our schema defined in the previous article for GraphCool. The majority is exactly the same (another benefit of using GraphQL schemas – a common language that developers using different programming languages can still understand – a benefit similar to SQL in that sense), however we still note a couple of differences:
- the lack of the extend keyword. To make things easier, GraphCool includes a root Query type in a separate file, here we’re using a single file to define our schema so we don’t need the extend keyword
- the lack of @annotations. Again since we’re not using GraphCool, we can do without these. The above is a plain vanilla GraphQL schema
Defining our GraphQL Resolver
So, right now GraphQL knows our schema, i.e. the structure of expected queries and the structure of the responses it should serve. But how should it actually get the data to serve such requests? This is the job of a “resolver”. It’s a class whose job is to “resolve” queries into actual data.
GraphQL Java Kickstart makes this easy by introducing an interface named GraphQLQueryResolver. So we simply need to create a file, and code a class which implements this interface, like so:
package com.example.demo.resolvers;

import com.coxautodev.graphql.tools.GraphQLQueryResolver;
import com.example.demo.types.Post;
import com.example.demo.types.Posts;
import org.springframework.http.HttpEntity;
import org.springframework.http.HttpHeaders;
import org.springframework.http.HttpMethod;
import org.springframework.http.ResponseEntity;
import org.springframework.stereotype.Component;
import org.springframework.web.client.RestTemplate;

import java.util.List;


@Component
public class Query implements GraphQLQueryResolver {

    HttpHeaders headers = new HttpHeaders();


    List<Post> posts( int count ) {

        if (count == 0) {
            count = 2;
        }

        headers.set("Authorization", "Bearer xyz");
        HttpEntity<String> entity = new HttpEntity<>("parameters", headers);

        RestTemplate restTemplate = new RestTemplate();
        ResponseEntity<Posts> response = restTemplate.exchange(
                "https://public-api.wordpress.com/rest/v1.1/me/posts?number="+count,
                HttpMethod.GET,
                entity,
                Posts.class);
        System.out.println(response.toString());
        return response.getBody().getPosts();
    }

}
A couple of pointers on the above code:
- The name of the class method matches the name of the query defined in the schema (posts). If you have multiple queries in your schema, you’d have multiple methods each with the same name as the queries defined in the schema
- The class method accepts as an argument the same name and type (int count) of argument we defined in our schema for this particular query
- Note the use of Spring’s RestTemplate and HttpHeaders to create a typical GET request including our Authorization Bearer header to the WordPress REST API.
- Note how we use the exchange method of RestTemplate to decode the received data into the Posts.class type. We still need to define this class, but defining this allows us to retrieve a POJO rather than deal with raw JSON. The following link is recommended reading to get some background:
Defining our JSON types
As we mentioned in the last point above, we need to define classes to allow RestTemplate to decode the raw JSON returned from the WordPress API into an easier to use POJO. Now, if you observe the JSON response from the API, you’ll note two things:
- There are a LOT of fields. We’re not interested in all of them, only a subset.
- The individual POST objects are wrapped in an array named POSTS, something like so:
{
   "posts" : [
       {...first post...},
       {...second post...},
       {... you get the idea...}
    ]
}
This means that we need to define TWO classes. The first – post – will describe the inner objects in the array that describe individual posts. The second – posts – will describe the outer object that contains the array. This latter is quite simple:
package com.example.demo.types;

import com.fasterxml.jackson.annotation.JsonIgnoreProperties;

import java.util.List;

@JsonIgnoreProperties(ignoreUnknown = true)
public class Posts {
    private List<Post> posts;

    public Posts(){};

    public void setPosts(List<Post> posts){
        this.posts = posts;
    }

    public List<Post> getPosts(){
        return this.posts;
    }
}
We simply need to define:
- An empty constructor
- a private class List variable that’s going to store our array of posts
- Getters and Setters for the above class variable
Note that we annotate this class with the @JsonIgnoreProperties(ignoreUnknown = true) property, This solves our first observation above, and allows us leave all the other fields returned in the JSON response as undefined in the POJO.
We’re left with defining the Post POJO:
package com.example.demo.types;

import com.fasterxml.jackson.annotation.JsonIgnoreProperties;

@JsonIgnoreProperties(ignoreUnknown = true)
public class Post {

    private String title;
    private String content;

    public Post() {
    }

    public String getTitle() {
        return title;
    }

    public void setTitle(String title) {
        this.title = title;
    }

    public String getContent() {
        return content;
    }

    public void setContent(String content) {
        this.content = content;
    }

    @Override
    public String toString() {
        return "Post {" +
                "title='" + title + '\'' +
                ", content=" + content +
                '}';
    }

}
In this case, we’re interested in the “Title“, and “Content” fields of the JSON response for the post type, so in the above code note that we define two private class variables – one for each of the JSON fields we’re interested in. We then define getters and setters for these variables, and last but not least we also override the “toString” method to allow us to more easily log the responses
Conclusion
That should be it, you’re golden if you can open the aforementioned GraphiQL playground and run a query with a successful response similar to the below:


You must be logged in to post a comment.